
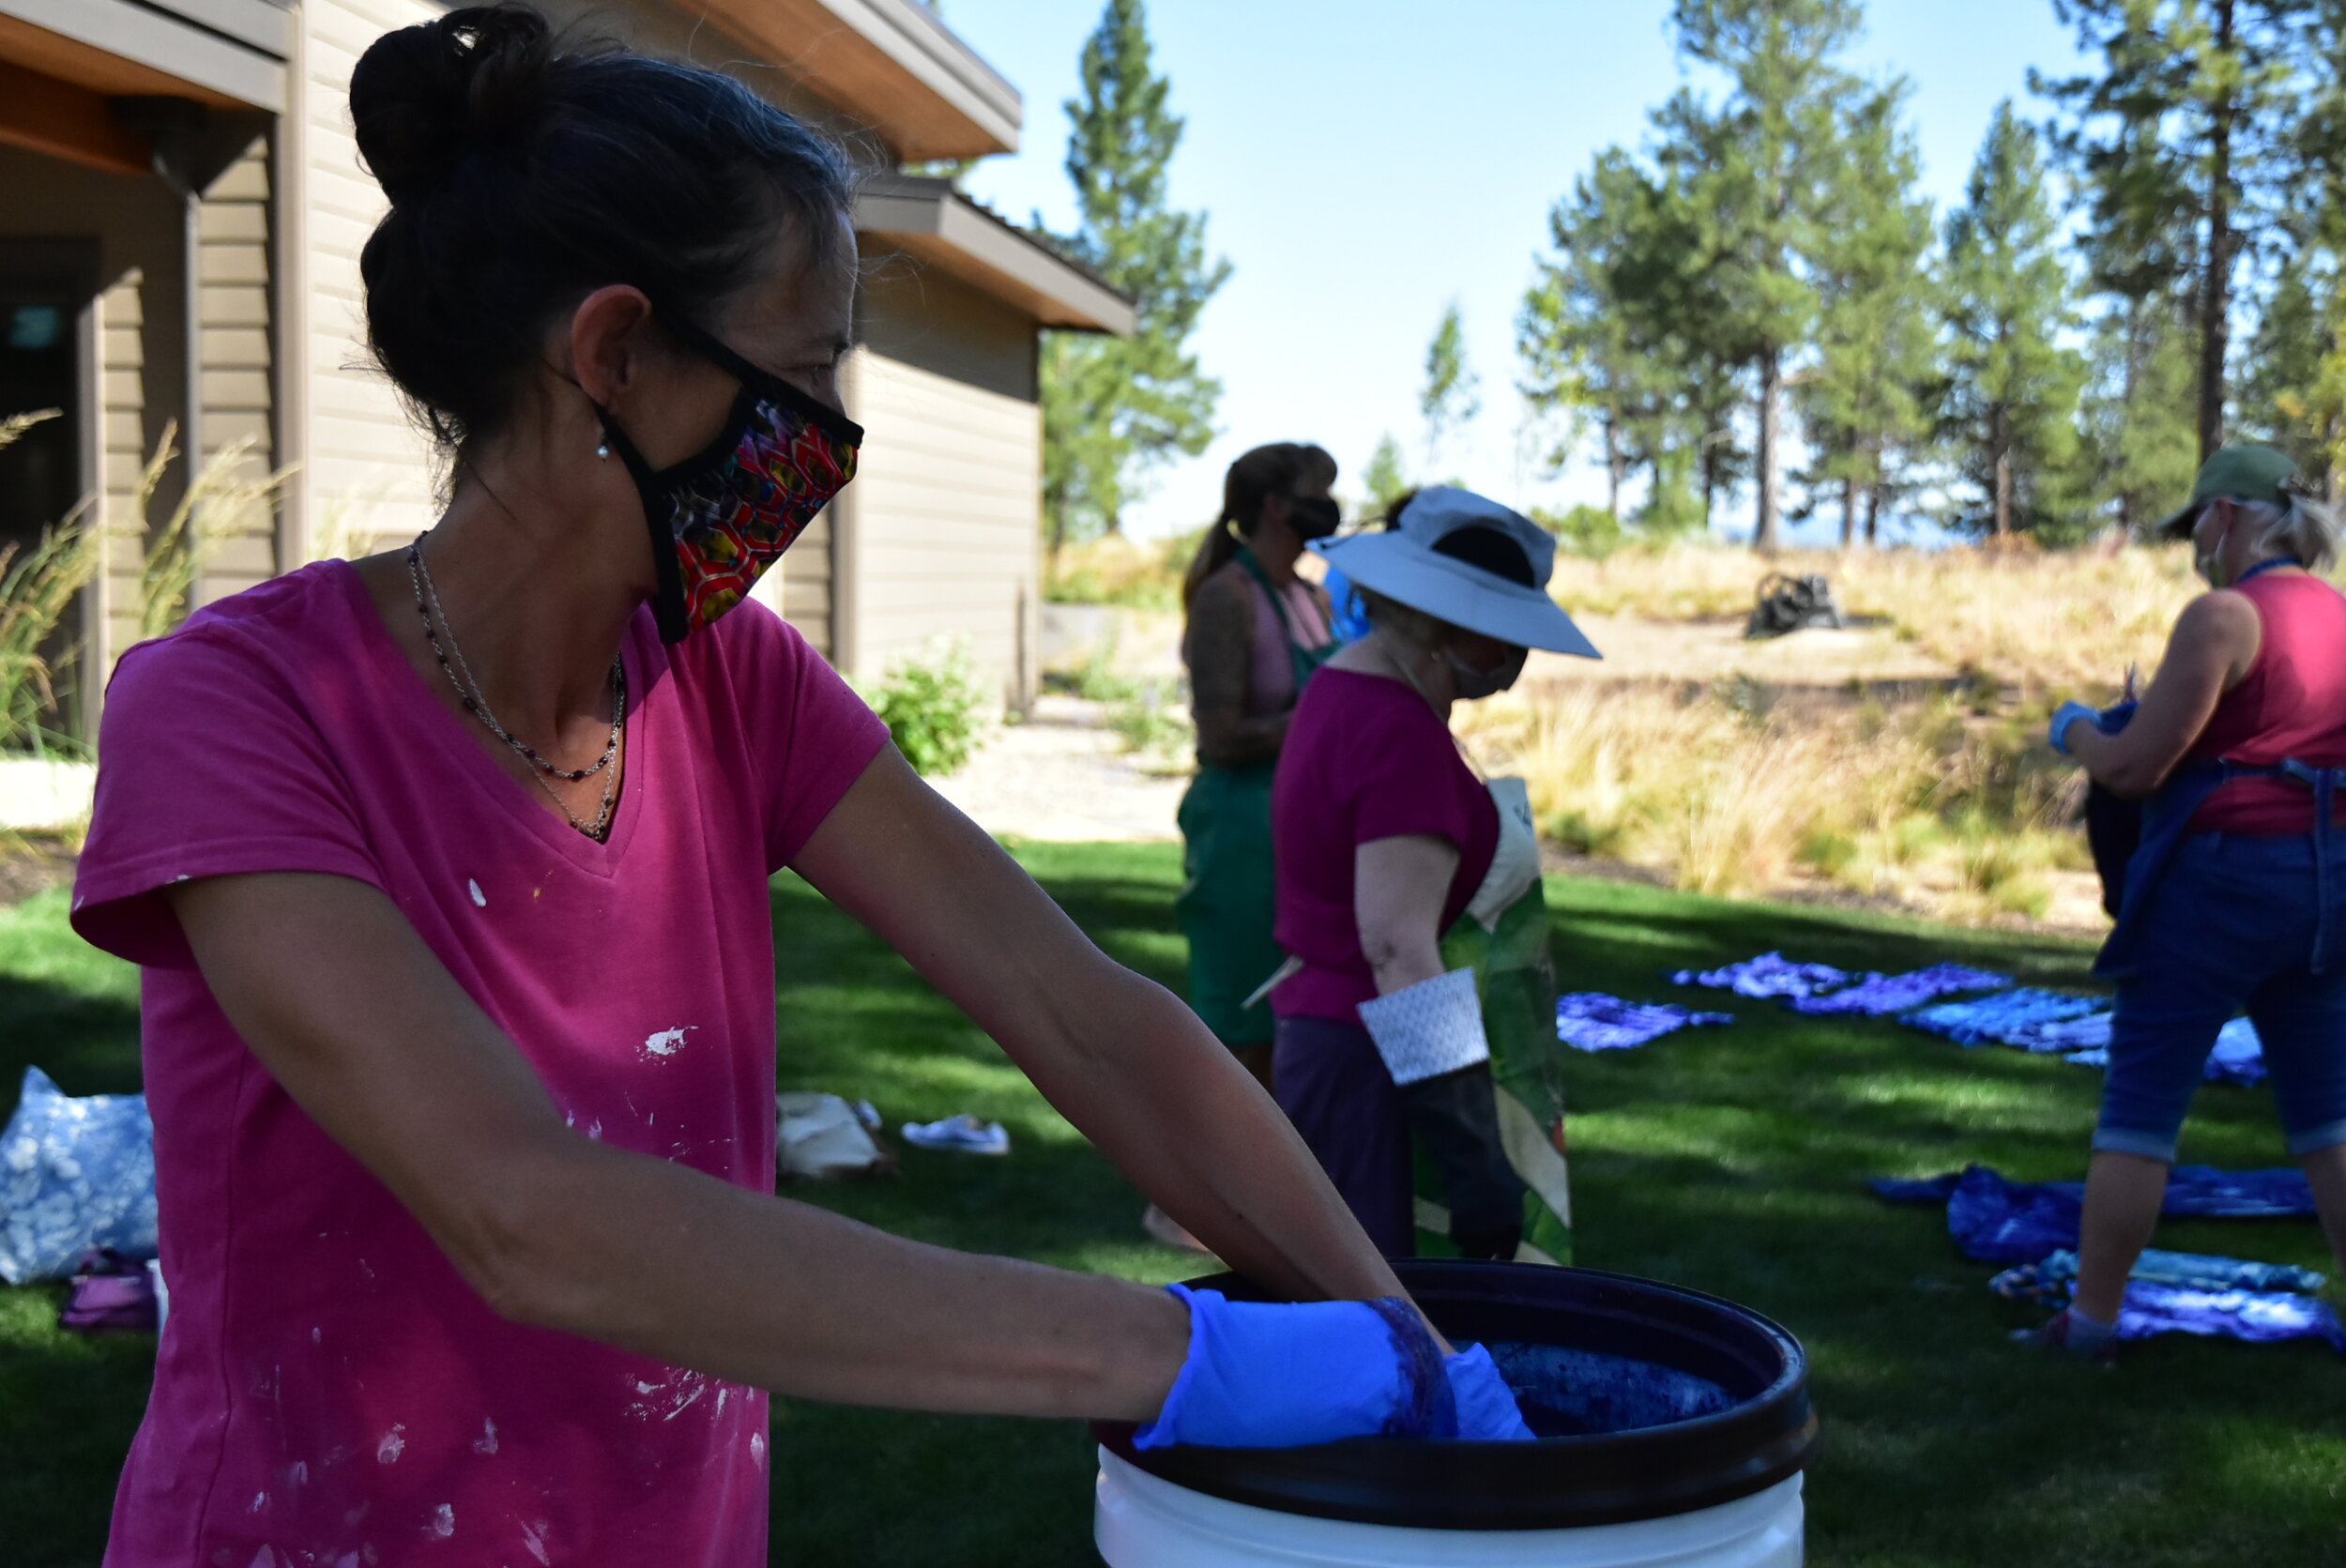
Dye set up, one table to prep and two for the dye baths which are sitting in the sun to warm up.
A couple of weeks ago my small quilt group, The Undercover Quilters, had our first in person meeting since the pandemic began. We made it extra special by doing an indigo dye day that was super fun and messy. I offered my new yard, since the group hadn’t yet been to my new house and we had plenty of room to spread out.
We had several goals in mind:
To overdye t-shirts that my sister and her husband screen printed with a new UCQ design (see below).
To experiment with other fabrics, especially for those who had never used indigo before.
To see each other and catch up with masks and social distancing in mind.

Prepping fabric.
If you would like to try indigo dyeing, it’s a perfect group activity for friends and family and also great for kids to experiment with. I highly recommend the Jacquard Indigo dye kit. You can also buy supplies in bulk, but one of the chemicals is very susceptible to degrading over time. I set up two dye buckets, but one was with older chemicals and it didn’t last nearly as long as the one with new kit. The best place to buy dyeing kits, PDF fabrics and pre-made clothing to dye is Dharma Trading Company. You may also find the dye kits at your local craft store. The Stitchin’ Post in Sisters, Oregon also carries them and that’s where I got mine.

Lots of oohs and aahs every time someone opens a piece of fabric.
It was a beautiful Central Oregon summer day with blue skies and temps in the 80s. Indigo dyeing is definitely a warm weather activity. I like a hot summer day as the dye bath works best and lasts longest when it’s warm. I like to start with warm water when mixing the bucket (5 gallon bucket with lid from the hardware store), but if I bring the dye pot out on a subsequent day I’ll let it sit in the sun to warm for a few hours.

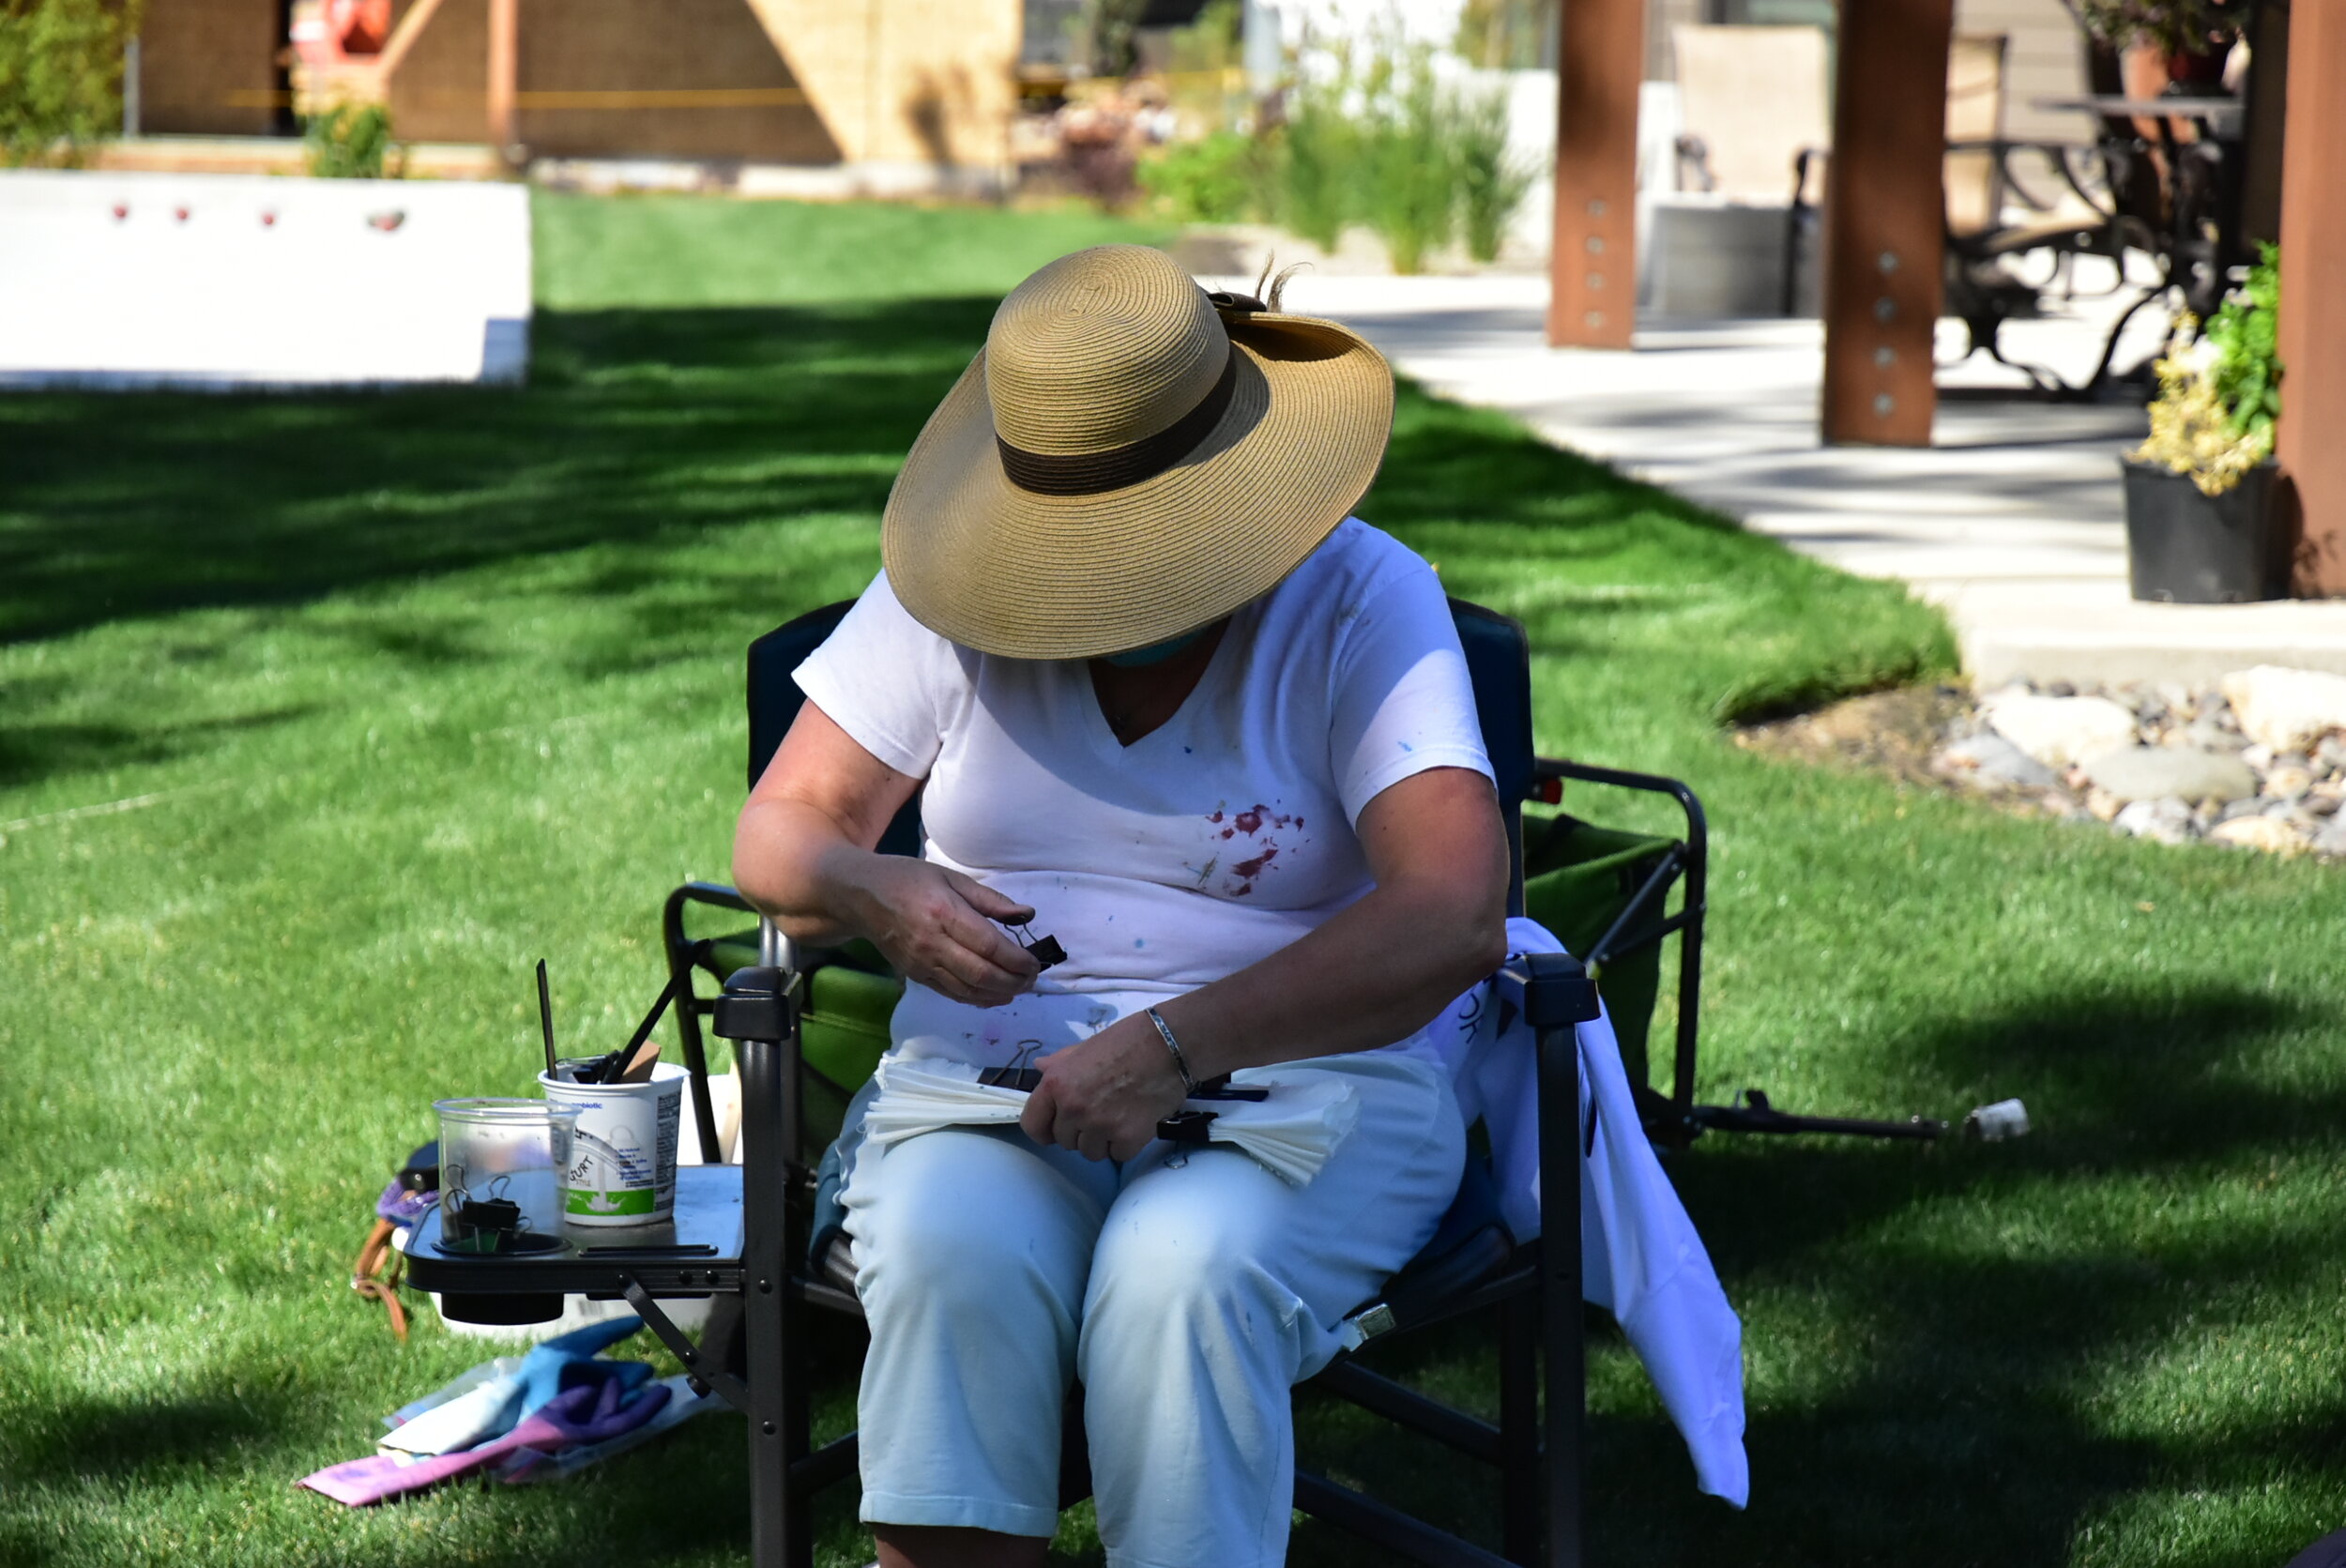
Cheryl taking off the rubber bands.
Fabrics need to “tied” or otherwise prepared for dyeing if you want to try shibori techniques, and then soaked in water for at least 10 minutes before dyeing. If you want to do a plain fabric, just soak as is. When it’s time to dye the fabric, stir the bucket gently in one direction, the quickly the other direction to get the “flower” to coalesce into a circle of bubbles. The surface of the dye pot will have a metallic blue sheen with bright green just below the surface. When you coalesce the flower you can then keep it out of the way, either by lifting it out and saving it in a separate container, or by just gently pushing it to the side as you dye.

Jane holds up her new shirt with the UCQ logo.
When you add your fabrics to the dye bucket, first gently squeeze out the extra water into the soaking bucket, then gently slip the fabric into the side of the dye bucket, trying to avoid adding extra air to the dye. It’s inevitable that oxygen will be added to the dye bucket, but you can try to keep it to a minimum. Gently manipulate the fabric below the surface to get the dye into any folds of fabric. You can leave in the bucket for one to several minutes, but I usually do it for 30 seconds or so. Take it out again slowly and squeezing out the dye just above the surface, trying to keep air out of the bucket. Place the item on the grass or other surface to be exposed to the air. When you take it out it will be bright green, but oxidation happens quickly and you’ll soon see your fabric turning blue.
Susan prepping fabric.
I keep forgetting to get photos of the various ways to prep the fabric, but you can use all sorts of items to shibori dye. I keep a bin full of marbles, wood blocks, clothespins, clamps, rubber bands, jar lids, and clips to use and every time I do it I’ll try new ways to fold and clip the fabric. If you do fold the fabric, try to do an accordian fold as much as possible as it exposes the fabric to the dye better than a straight fold.
Erin using gloves in the dye bath.
Don’t forget your gloves! It’s inevitable that you’ll turn blue at some point, but you can minimize exposure with gloves.

Jane and Susan prepping fabric.
I had three tables set up. One for prepping fabric, and two for each of the dye buckets. I didn’t have a clothesline set up, but one can be handy for drying your fabric.
When you first make up the dye it will dye everything dark blue with even a quick dip. Doing multiple dips will make the blue darker each time and you can use that to your benefit to make an ombre dyed piece. As the dye gets used over time, the color will get weaker. One thing to note was that all the pieces from this first set of photos were dyed with the two dye buckets I made up that day. Later on I did further dyeing and the pieces didn’t get as dark (see below).


After dyeing we had a nice chat in the yard. It was so great to see everyone!


Suzanne was the last one dyeing.

Lots of smiles behind those masks! L to R: Erin, Cheryl, Sally, Betty, Cindy, Martha, Jane, Kristin, Susan, Suzanne.
On Monday of this week (about 8 days after making the dye pot) I was able to do some more dyeing with the dye pot made from the kit. The one with the old chemicals was exhausted and I had to dump it.
I had a bunch of pre cut fabrics- Habotai silk, silk gauze, silk velvet, Kona cotton, and cotton lawn that I wanted to use. I had so much fun doing these. It took a long time to prep the fabrics and undo the clips, but dyeing took only 1/2 hour. The various shades of blue are due to the fabric type, with the silk velvet being the darkest.

Yesterday I had one more session with the dye pot. The blues are getting pretty weak now, so I think this is the end of it. I took these photos while the fabrics were still wet and therefore look darker than the finished product. I was pretty impressed with how long the dye bucket lasted. The box says it will dye 15 shirts, but as see here, you can do many more pieces of fabric if you don’t mind using it as the color weakens. Multiple dips will also help get darker blues as the dye weakens.
Once you are done dyeing, let your pieces dry completely, then you can wash as normal in the washing machine and you are done. It’s such a fun project for everyone I hope you’ll give it a try if you haven’t gone down the indigo path yet.

2 yard piece of lightweight linen

10 vintage napkins, everyone gets a unique design!

lightweight linen

linen


vintage bread cloth

Essex cotton/linen blend

Diamond Textiles embossed cotton (dyed unevenly possibly due to chemicals used in manufacturing process).


Results of three dye days- ready for sewing!