
So what does a fabric face phobic person do when someone in their group suggests everyone make a fabric face? In my case, she goes a little overboard learning about and getting comfortable with fabric faces. I ended up spending most of the month of April working on various faces with a little help from this book by Melissa Averinos. I requested that my library get her new book, Making Faces in Fabric, and within a few weeks they had actually gotten in 2 copies. I went to town as soon as it came in. Today I'm starting a new blog series about the various faces I made over a monthlong period.

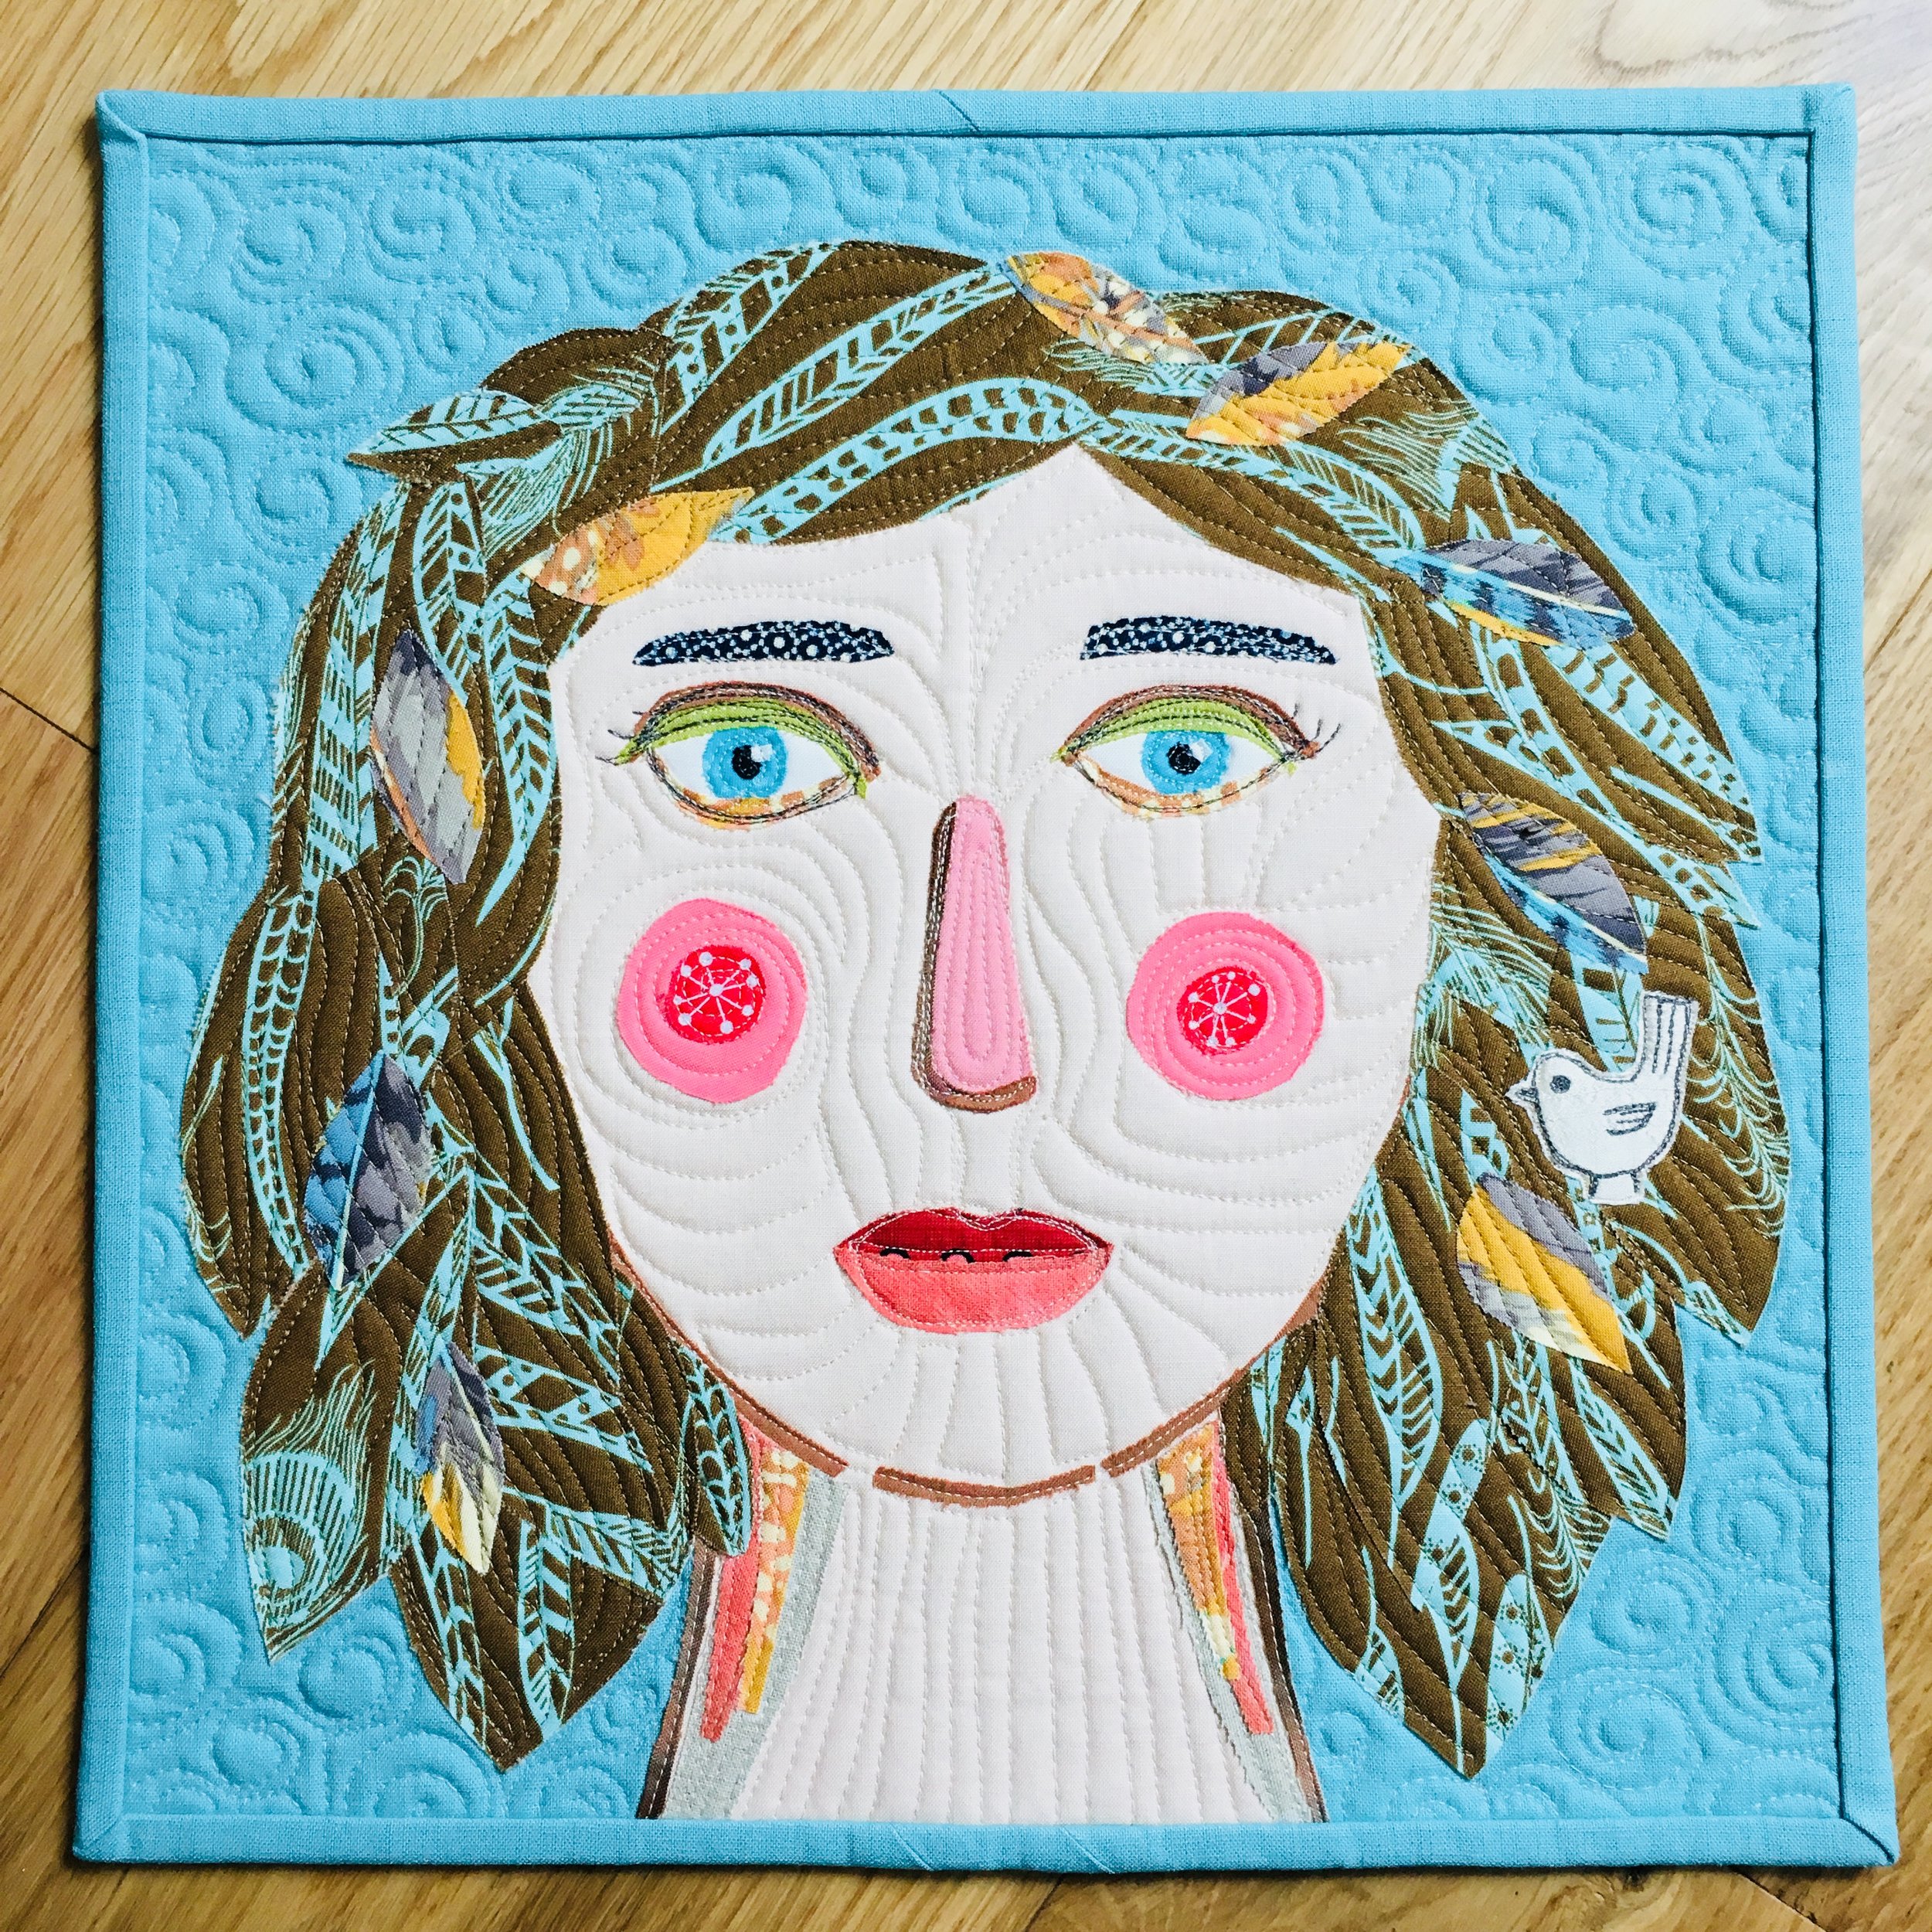
So, it was someone in my Undercover Quilters group who suggested that we all make a self portrait in a 12" square size. At first, I was thinking I'd just do a bird and call it good, but then everyone argued that it had to be an actual human face. Photographic likeness wasn't necessary, but it should have a good approximation of skin color, hair color, eye color and hair style. On this one I didn't actually try to make it look like me except for those 4 features.
I forgot to take photos earlier in the process, but after doing several of these I have a process that I follow and it always starts with the eyes. Once the eyes are staring at me, it's so exciting I can't wait to continue. The most fun to me is making the hair. It's the perfect opportunity to play with great prints. I happen to have several good possibilities in the stash, so I know I'll keep making faces for a while.

The other thing I noticed with these faces is that the slightest adjustment of features or hair can make a huge difference, so I take a ton of cell phone photos as I go.

Once the features all fused to the face fabric I started looking for a background. The one below is a bit busy even though I liked the colors. Also, you'll notice that on this one I fused the hair down to the face fabric. On all the others after this I trimmed around the face before deciding on a background fabric and then added the hair at that time. I learned a lot making this first one and refined the process in later faces.

I finally decided on the turquoise linen below and fused it all down. It was at this point I realized that if I wanted to keep the hair shape (and I really, really liked the hair shape), I would have a piece that measures out at 13.5" square. It's a little bigger than it was supposed to be, so I think I may end up doing a second selfie at some point anyway.

Building the facial features and hair is so much fun that I was really feeling kind of nervous about the machine quilting. Machine quilting is really a necessary evil in the best of times. In the case of a face I started to feel that if it went wrong I'd mess it up and make weird lines in the face. However, once I started I was so into it I didn't even realize where I was going. I didn't intend to make the cheeks in two different patterns. I had finished the second one before I realized what happened, but you know what- it doesn't matter! I really love how this piece came out. In subsequent faces I have refined the face shape and size and figure out how to make a face that fits within my design parameters. I'll be sharing all that in the next few posts.
If you've been curious about making fabric faces I hope you'll check out Melissa's book and give it a try. I found her book to be an excellent way to take the fear out of making faces. There's a whole chapter on drawing a face for those who've never done that. There are also many, many wonderful examples to refer to for ideas. I enjoyed the book so much that I ended up buying it at one of my local quilt shops. Now, I have the perfect reference to keep around for future faces and I guarantee there will be more! Stay tuned for more posts about this first bunch of faces.
